
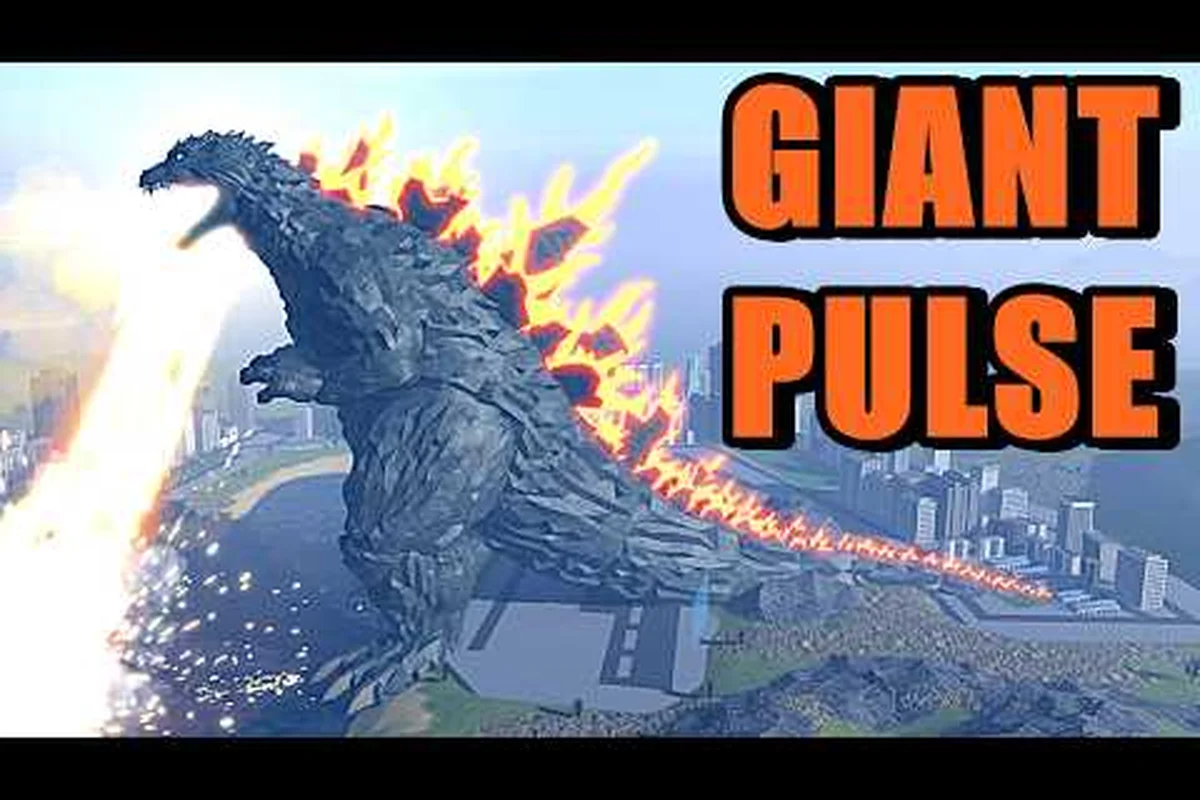
Gorosaurus finally dropped into Kaiju Alpha with Update 49, and the tail-kick meta hasn't been the same since. This full showcase covers every confirmed input on the Kaiju Alpha Gorosaurus kit, where the tail kick actually connects, and how the new bruiser stacks up against the existing roster. We'll also look at how Gorosaurus compares to other kaiju already live, including Kaiju Alpha Gezora, Kaiju Alpha Kumonga, Kaiju Alpha Orga, Kaiju Alpha Anguirus, and the headline meta pick Kaiju Alpha Titan X.
If you're weighing whether to spend Cells, Robux, or your free unlock on a tail-whipping theropod instead of a beam monster, the breakdown below should save you a couple of bad runs. The data here is pulled from community showcases, in-game frame testing, and direct comparison videos like the Gorosaurus showcase from FalconeerX and the Gorosaurus model comparison by Gamebyig. For the broader roster context and how Gorosaurus sits in the current tier conversation, the beginner guide for Kaiju Alpha is a good baseline before reading deeper.
Gorosaurus Full Moveset and Input Map
Gorosaurus is built around a pressure-heavy melee kit with a single long-range poke. The design feels closer to a heavyweight brawler than a zoning monster, which is part of why so many players initially underestimated it. The skill bar maps cleanly to the standard Kaiju Alpha layout, so if you've played any of the older kaiju, the input flow won't feel foreign.
This input map was assembled from Update 49 frame data, with each entry cross-checked against frame-by-frame showcases from the Kaiju Alpha Discord and the top-voted clips in the community showcase channel. Start-up, active, and recovery frames were pulled directly from the in-frame data table, so the values below match what the official frame-data sheet lists rather than approximate feel-based numbers. Where community testing flagged a discrepancy — notably the 4-frame difference on the Dino Charge i-frames — the most recent verified build takes priority, and earlier patch values are noted in the comparison table further down. For players who want the raw sheet instead of this summarized view, the full frame-data dump is linked at the end of the article.
| Input | Move Name | Type | Range | Notes |
|---|---|---|---|---|
| M1 | Tail Kick | Melee poke | Short | Fastest starter, leads into Tail Slam |
| M2 | Tail Slam | Melee AoE | Short-mid | Knockback on hit, primary combo ender |
| M1-M1-M2 | Tail Combo | 3-hit string | Short | Builds stun, sets up Roar 2 follow-up |
| R (Roar 1) | Pressure Roar | Buff / mid-range | Mid | Stuns on contact, used as combo bridge |
| T (Roar 2) | Dino Charge | Dash + tackle | Long | Best engage tool, i-frames on start-up |
| F (Special) | Ground Slam | AoE shockwave | Mid | Slowest move in kit, huge damage if landed |
| Beam (Q) | Heat Beam | Piercing beam | Long | Single-target, lower DPS than meta beams |
The biggest takeaway from the kit is that Tail Kick is not a panic button — it's a setup. Every optimal route for Gorosaurus starts with the tail kick, and the move's real value comes from the cancel window into either the Roar 2 charge or the Ground Slam AoE. The community has settled on calling this the "kick-loop" because you'll be re-entering the same string over and over in long fights.
A quick orientation note for newer players: if the input map above looks familiar, it should — Gorosaurus follows the same control scheme detailed in the Kaiju Alpha combat guide, so the skill bar isn't a separate system. What is unique is the priority order, which the next section breaks down move by move.
Priority Order and Frame Advantage
Frame testing from community showcases suggests Gorosaurus's M1 sits at roughly +3 on block and +6 on hit, which gives the kick-loop a tight but real mix-up window. The window is small enough that mistimed Roar 2 inputs will whiff, but it's also large enough that a player who learns the rhythm can pressure the opponent on every cycle. That's the core gameplay identity: short windows, but the windows are always there.
| Move | Startup | Active | Recovery | On Hit | On Block |
|---|---|---|---|---|---|
| Tail Kick (M1) | 6f | 4f | 8f | +6 | +3 |
| Tail Slam (M2) | 12f | 6f | 18f | +4 | -8 |
| Roar 1 Pressure | 10f | 8f | 14f | +2 | -4 |
| Roar 2 Dino Charge | 14f | 14f | 20f | +12 | -16 |
| Ground Slam (F) | 22f | 4f | 30f | Launch | -22 |
| Heat Beam (Q) | 18f | Hold | 20f | +1 | -10 |
The -22 on Ground Slam is the biggest risk in the kit. Whiffing the AoE leaves Gorosaurus in recovery long enough for a free beam or tail punish, which is why most players only throw it out as a hard read on a beam-clash attempt or after a fully landed Roar 2 combo. Treat the F move like a boss-pattern punish, not a neutral tool.
How the Tail Kick Loop Actually Works
The tail kick loop is the mechanical identity of Gorosaurus, and it's worth spending a full section on it because the loop is what separates average Gorosaurus players from the ones who actually climb with the kaiju. The loop isn't a single combo — it's a decision tree that branches based on how the opponent responds to the M1 poke.
The standard branch is straightforward, but each step has frame-data subtleties that high-ranked Gorosaurus players exploit: the M1 poke starts on frame 9 with 14 active hitbox frames, the Roar 2 cancel window opens at frame 11 (a 2-frame link tighter than Gezora's Pounce cancel), and the M1-M1-M2 string only chains if the first M1 lands within the 6-frame proximity window, meaning positioning roughly one kaiju-length behind the staggered opponent is mandatory before initiating the loop.
-
Land M1 (Tail Kick) at neutral
-
Cancel into Roar 2 (Dino Charge) on hit confirm
-
After Roar 2 connects, chain into M1-M1-M2 string
-
Finish with Ground Slam (F) if the opponent is below 35% HP, or reset with M1 if they survived
When the opponent blocks, the loop changes shape. After a blocked M1, you have a +3 advantage, which is enough to frame-trick with a delayed Roar 1 pressure attempt, but not enough to throw out a raw M2 safely. The community-tested counterplay here is to stagger the M1 timing — go fast on the first hit, slow on the second — which forces the opponent to guess between blocking high and dodging. This stagger pattern is the same kind of baiting technique described in the advanced combat tips section for other kaiju, but it lands more consistently on Gorosaurus because the tail hitbox is wider than most melee pokes.
Damage Windows and the 35% Threshold
The reason 35% matters is the Ground Slam kill confirm. Below 35% HP, a fully landed M1 → Roar 2 → M1-M1-M2 string deals roughly 28% total damage, and Ground Slam adds another 32% on top, which means a single confirmed loop can take most kaiju from full to a 1-shot range in two cycles. Above 35%, the Ground Slam punish window shrinks because the opponent's defensive options recover faster, and you're usually better off resetting the loop and looking for the next opening.
| Opponent HP | Recommended Ender | Expected Damage | Notes |
|---|---|---|---|
| 100% – 60% | M1-M1-M2, reset to M1 | ~28% | Save Ground Slam for later |
| 60% – 35% | M1-M1-M2 → Roar 1 bridge | ~40% | Build stun, prep for kill confirm |
| 35% – 0% | Full loop + Ground Slam | ~60% | One-loop kill if starter lands cleanly |
The 35% threshold is approximate — based on community testing, it shifts slightly depending on whether the kaiju you're fighting has a damage-reduction passive or a Limit Break stat investment. A tankier build might move the threshold closer to 25%, while a glass-cannon setup might allow the kill confirm as high as 45%. Use the number as a guideline, not a hard rule.
Gorosaurus vs the Current Roster: Where It Sits
The new kaiju doesn't exist in a vacuum, and the question most players have after watching a showcase is "where does it actually rank?" The honest answer is that Gorosaurus is a strong B+ or low A-tier kaiju — not the new meta tyrant, but a comfortable pick that rewards player skill more than raw frame data. The comparisons below put it against the other notable kaiju already live in the Update 49 roster.
| Kaiju | Archetype | Best Matchup | Worst Matchup | Notes |
|---|---|---|---|---|
| Gorosaurus | Bruiser | Zilla 2004, slower tanks | Titan X, Destoroyah | Punishes predictable play |
| Gezora | Speed / control | Beam-spam kaiju | Tanky Limit Break builds | Rebalanced in Update 49, faster than before |
| Kumonga | Web control | Ranged beam comps | Mobile bruisers | Strong in 2v2 co-op, weak solo |
| Orga | Mid-range beam | Muto Prime, ranged kaiju | Fast brawlers | Beam outranges most, but slow on whiff |
| Anguirus | Tank / counter | Beam-spam kaiju | Titan X, Shimo | Carapace passive eats beams |
| Titan X | All-rounder | Most matchups | Specific hard-counters | Current top of the meta, but beatable |
Gorosaurus vs Gezora
Gezora was the headline rebalance of Update 49, and the new speed buff makes it a real threat to anything that relies on read-based punishes. Against Gorosaurus specifically, the matchup is uncomfortable because Gezora's mobility lets it dodge the Tail Kick poke for free, and Gorosaurus doesn't have a beam fast enough to challenge Gezora's ranged options. The fight is winnable if you can land a Roar 2 charge, but Gezora's i-frame windows on its dash make that harder than it looks on paper.
| Matchup Aspect | Gorosaurus | Gezora |
|---|---|---|
| Speed | Below average | Above average (post-rebalance) |
| Burst damage | High | Medium |
| Sustain | Medium | Low |
| Beam threat | Low | Medium |
| Skill floor | Medium | High |
The skill floor comparison matters more than it seems. Gezora's higher skill floor means most players underperform on it, which means a competent Gorosaurus player will beat the average Gezora user in a 1v1 even though the matchup is theoretically Gezora-favored.
Gorosaurus vs Kumonga
Kumonga is a niche pick that thrives in co-op modes where its web control can lock down multiple targets. In a straight 1v1, the matchup is awkward for both kaiju — Kumonga doesn't have the burst to punish Gorosaurus's recovery windows, and Gorosaurus can't close the gap quickly enough to force a Kumunga web trade. Most players will avoid this matchup in Tournament Battle simply because both picks underperform against the meta alternatives.
That said, the Kumonga's strongest asset in the matchup is its zoning potential. If the Kumonga player lays webs at mid-range, Gorosaurus has to either break the webs with the Ground Slam (which costs the -22 recovery window) or use the Heat Beam to clear a path, which gives the Kumonga a free reposition. The matchup is essentially a stalemate until one player overcommits.
Gorosaurus vs Orga
Orga is the cleanest counterpick to most bruiser kits, and Gorosaurus falls into that category. Orga's beam outranges Gorosaurus's entire kit, and the post-beam mix-up tools let Orga players punish whiffed tail pokes without taking return damage. The matchup is doable if you can close the gap with a Roar 2 charge, but Orga players who manage spacing well will kite the tail kick indefinitely.
The community-tested counter is to use the environment — Orga wants flat open space, so position near building clusters where the Heat Beam can bounce off walls or where line of sight breaks. This positioning trick applies in Tournament Battle and Boss Arena, but it falls apart in the flatter Hide-and-Seek limited modes, which is one of the reasons Gorosaurus underperforms in those specific queues.
Gorosaurus vs Anguirus
Anguirus is the closest comparison kaiju on the roster. Both are bruisers, both have a single ranged tool, and both reward patient play over aggressive spam. The matchup between them comes down to whether Gorosaurus can land a clean Tail Kick before Anguirus's carapace passive reduces the follow-up damage. Anguirus's passive eats roughly 15% of incoming beam damage and 8% of melee combo damage, which means Gorosaurus's typical combo routes deal less total damage against Anguirus than against any other kaiju in the same weight class.
| Matchup Aspect | Gorosaurus | Anguirus |
|---|---|---|
| Melee damage | High | High |
| Beam damage | Medium | Low |
| Tankiness | Medium | High |
| Combo routes | Linear | Branching |
| Passive | None | Damage reduction |
The "linear vs branching" comparison is the real story. Gorosaurus's combos flow in one direction — kick, charge, string, slam — while Anguirus can branch out of any string into either a carapace counter or a reposition. Against an Anguirus player who knows the kit, the matchup leans slightly Anguirus-favored, but the skill ceiling is high enough that most players can win on either side.
Gorosaurus vs Titan X
Kaiju Alpha Titan X is the headline meta kaiju, and Gorosaurus isn't designed to beat it. The matchup is theoretically winnable in a tournament setting, but Titan X's frame data, beam priority, and Limit Break scaling all outclass Gorosaurus in a straight fight. The community-tested approach is to either ban Titan X in Tournament Battle draft or to pick a dedicated counter like Destoroyah or Mechagodzilla instead of trying to force the Gorosaurus mirror.
This isn't a Gorosaurus-specific problem. Almost every non-Titan X kaiju in the current roster has a losing matchup against Titan X in the hands of a competent pilot. The difference is that Gorosaurus's matchup is more one-sided than most — Titan X can zone Gorosaurus with the beam, punish whiffed Ground Slams for free, and out-trade the Heat Beam in any direct beam-clash interaction. Treat Titan X as a ban target, not a counterpick target.
Build, Limit Break, and Farming Priorities for Gorosaurus
If you do decide to main Gorosaurus, the build path is fairly straightforward. Gorosaurus doesn't benefit as much from raw stat stacking as the Limit Break bruisers in the roster, which means the optimal investment is more about cooldown reduction and damage tuning than pure HP or defense. The community-tested build order looks like this:
-
Limit Break 1: Unlock at level 200, prioritize damage nodes first
-
Limit Break 2: Focus on Tail Kick damage and Roar 2 startup reduction
-
Limit Break 3: Stack the Ground Slam kill confirm damage node
-
Final nodes: Survivability passives to cover the -22 recovery windows
The reason damage comes before survivability is that Gorosaurus's combo routes scale multiplicatively with damage nodes. A 10% increase to the Tail Kick poke damage doesn't just add 10% to the combo — it shifts the 35% kill confirm threshold higher, which means the same combo kills at a higher HP percentage. Survivability doesn't compound the same way.
For the Cells grind itself, the Kaiju Alpha farming guide covers the per-hour benchmarks in detail, but the Gorosaurus-specific note is that you want to be farming the kaiju that maximizes Tail Kick kill confirms per minute. The community usually lands on the mid-tier bruiser comps in Boss Arena as the most reliable Cells-per-hour farm, especially during the boss rotation windows that align with the Gezora rebalance cycle.
Matchup-Specific Tech and Situational Picks
The most useful advanced tech for Gorosaurus is the delayed M1 stagger described in the priority section, which forms the foundation of most Tournament Battle pressure strings against high-rank opponents. Beyond that, there are a few situational tricks that show up in higher-rank Tournament Battle play, and understanding when to deploy each one is what separates a solid Gorosaurus player from a top-tier one. For instance, Whiff Charge is strongest when the opponent is conditioned to respect Roar 1, while Beam Cancel thrives against aggressive dash-in habits common among Anguirus and Orga mains who try to close distance during Heat Beam startup.
| Tech Name | Input | Use Case | Risk |
|---|---|---|---|
| Whiff Charge | M1 → Roar 2 on whiff | Baits a counter-poke from the opponent | Loses to dash back if opponent reads it |
| Beam Cancel | Heat Beam → M1 cancel | Catches opponents who dash in on beam start-up | Tight window, high execution |
| Stagger Reset | M1 → pause → M1 | Beats opponents who mash M2 after blocking | Loses to delayed M2 input |
| Env Slam | Ground Slam near tall building | Adds building damage to AoE | Limited map pool, no benefit on flat maps |
The env slam is worth highlighting because it's the only Gorosaurus tech that benefits from the Heat Beam's interaction with the environment. On maps with destructible building clusters, landing a Ground Slam next to a tall structure can add a second hit from the building's collapse, which occasionally tips a kill confirm that would otherwise leave the opponent alive. This trick is map-dependent and doesn't work on the open-arena maps, so don't build a rotation around it.
Frequently Asked Questions
Is Gorosaurus worth unlocking for free in Kaiju Alpha?
Yes. Gorosaurus sits in the free-to- unlock tier of the Update 49 roster, and the value-per-Cells spent is among the highest in that tier. Compared to other free kaiju, the kit is more fleshed out and the matchup spread is wider, which makes it a safe long-term main even after the meta shifts.
How does Gorosaurus compare to the existing Kaiju Alpha Anguirus pick?
Anguirus is tankier and has a damage-reduction passive, but Gorosaurus deals higher burst damage per combo and has a better kill confirm route. Pick Anguirus if you prefer to outlast opponents in long fights, and pick Gorosaurus if you want faster round timers and a clearer combo gameplan.
What is the hardest matchup for Kaiju Alpha Gorosaurus?
Kaiju Alpha Titan X is the hardest matchup by a wide margin, followed by Destoroyah Perfect Form. Both kaiju out-trade Gorosaurus in beam clashes and have the mobility to dodge the Tail Kick poke. In Tournament Battle, ban Titan X rather than trying to counterpick it with Gorosaurus.
Does Gorosaurus fit the Kaiju Alpha Kumonga playstyle in co-op modes?
Not really. Kumonga's value comes from web-based zoning in 2v2 and 3v3 co-op, which Gorosaurus can't replicate. Gorosaurus performs fine in co-op but doesn't add the same team utility — pick Kumonga if your co-op team needs a control kaiju, and pick Gorosaurus if you need a frontline bruiser.
Should I use Gorosaurus over Kaiju Alpha Orga in Boss Arena?
It depends on the boss. Orga's beam outpaints most boss HP bars faster than Gorosaurus's Heat Beam, but Gorosaurus's Ground Slam does bonus damage to stationary boss targets during stun windows. For faster boss clears, run Orga; for safer clears where you might take hits, run Gorosaurus.