
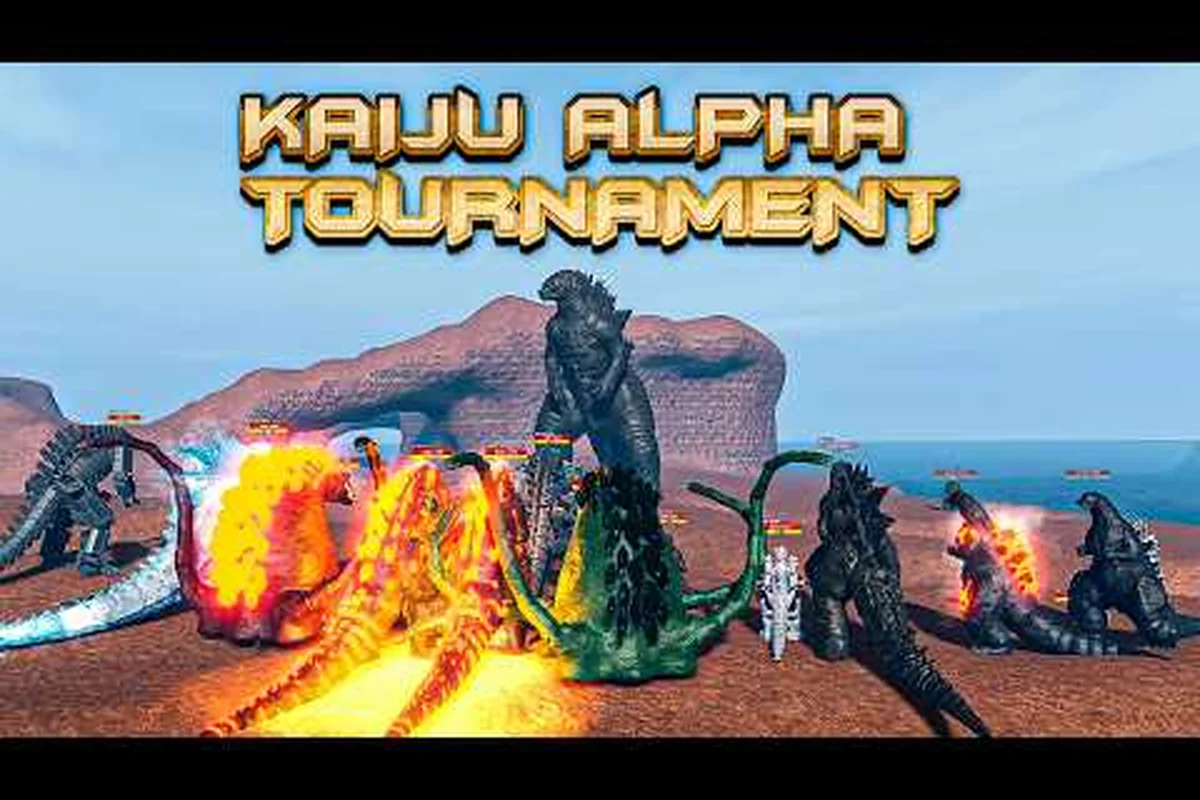
Every kaiju alpha boss fight eventually comes down to three decisions: which arena you queue into, which combat mode the lobby rotates to, and which kaiju you loaded in with. The modes look wildly different on the surface — boss arenas with punishing HP bars, kaiju alpha pvp mode lobbies where beam clashes decide rounds, free-for-all city maps where eight titans crash into each other, and the seasonal kaiju alpha godzilla hide and seek rotation — but the underlying economy of cooldowns, roars, and Cells farming is identical. This guide breaks down each mode, the kaiju picks that actually clear content, and the practical patterns experienced players use to win.
According to gameplay footage of the kaiju alpha boss fight, the encounter follows a structured multi-phase pattern where the boss cycles through distinct attack rotations, with players needing to manage positioning and ability cooldowns to survive the escalating damage output.
Understanding the Kaiju Alpha Boss Arena and Why It Matters
The kaiju alpha boss arena is the dedicated single-boss rotation inside the game-modes tab. Each boss comes with a telegraphed kit, a damage phase, and a vulnerable window that opens after the boss commits to a major attack. Players who treat the arena as a straight damage race burn out their kaiju before the phase shift and lose the reward Cells. Players who treat it as a cycle of bait, punish, and reposition consistently clear bosses in two to three minutes per attempt.
The arena pulls from a rotating boss pool that includes evolved Godzilla variants, Skar King, Destoroyah Perfect Form, and the seasonal Godzilla Minus One encounter. Each rotation has its own modifiers — burn damage on Destoroyah, frost shards on Shimo, terrain hazards on Skar King. According to community data, the boss pool resets every 48 hours, and the most consistent clearers build around a versatile kaiju rather than a one-trick specialist.
Core Boss Arena Mechanics
Underneath every kaiju alpha boss fight encounter, three interlocking mechanics govern the arena: the telegraph phase, the stagger threshold, and the enrage timer — and ignoring any one of them will get your raid wiped. The telegraph phase rewards baiting heavy attacks at 8+ meters of range before closing in for a punish combo; the stagger threshold demands that your team bank burst damage (roughly 30% of max HP) into a 4-second window for a guaranteed knockdown; and the 90-second enrage timer forces you to transition into phase 2 or face a +40% damage and movement speed buff that most teams cannot out-DPS without cheese strats.
-
Telegraph phase — every boss telegraphs its heavy attack with a 1.2 to 1.8 second wind-up. This is your free damage window if you bait the attack at range, then close the gap.
-
Stagger threshold — bosses stagger after taking roughly 30% of their max HP in burst damage within a 4-second window. Saving a beam for the stagger finish is the difference between a clean clear and a drawn-out slugfest.
-
Enrage timer — most bosses enrage at the 90-second mark, gaining a damage and movement speed buff. Players who fail to reach phase 2 before enrage typically lose the run.
Boss Pick Priority by Matchup
Picking the right kaiju for a specific boss is half the fight, and the decision usually hinges on two layered factors: the boss's elemental typing (which activates or nullifies your passive resists) and the encounter's phase script (beam spam windows, frost tick cadence, or melee punish windows). For example, bringing a frost kaiju into a burn boss matchup will still deal neutral damage since burn passives ignore frost typing entirely, so the beam-clash win condition and 12-second cooldown rotation matter more than the elemental triangle. The table below summarizes the community-tested top picks for each boss archetype, ranked by simulated clear time on the kaiju alpha boss arena patch rather than raw lore popularity.
| Boss Archetype | Top Pick | Reason | Alternative Pick |
|---|---|---|---|
| Burn (Destoroyah Final) | Godzilla Ultima | Beam range controls spacing, fire resist passive | Evolved Burning Godzilla |
| Frost (Shimo) | Monster X | High HP pool survives frost ticks | Striker Eureka |
| Physical (Skar King) | Kong (Advanced) | Burst melee counter-skills | Super Goji |
| Beam-spam (Space Godzilla) | Destoroyah Perfect Form | Beam clash wins | Mechagodzilla |
| Mixed (Evolved Godzilla Minus One) | Minus One (Evolved) | Film-accurate kit covers all phases | Biollante |
A common mistake newer players make is queuing into a burn boss with a frost kaiju and expecting the elemental passives to do the heavy lifting. The passives matter, but the cooldown economy and beam-clash interaction decide the run far more than the type matchup.
Winning the Kaiju Alpha PvP Mode Round by Round
The kaiju alpha pvp mode is the primary competitive format and the test bed for any kaiju you intend to use elsewhere. Rounds are 90 seconds, kaiju are locked to a chosen slot, and the winner of the round gets a small Cells bonus on top of the match reward. Players who treat the mode as a duel and not a brawl climb faster than players who spam beam into crowds.
Beam clashes deserve special attention because they are the most common round-ending interaction. When two beam-type kaiju lock into a beam clash, the player who lands the most timed inputs within the bar window wins the clash and stuns the opponent. According to community testing, the optimal mash rate sits between 4 and 5 taps per second, which lines up with the input window the game reads as valid. Faster mashing gets ignored; slower mashing loses the bar.
PvP Mode Matchup Cheat Sheet
| Matchup Type | Win Condition | Common Mistake |
|---|---|---|
| Beam vs Beam | Win the beam clash through mash timing | Spamming M1 instead of timed taps |
| Beam vs Melee | Maintain mid-range, punish dash-in | Letting melee kaiju close for free |
| Melee vs Melee | Bait out the heavy, punish with combo | Trading M1 chains endlessly |
| Tank vs Assassin | Hold ground, save burst for engagement | Wasting defensive cooldowns early |
Players looking to tighten their overall game should also brush up on the broader Kaiju Alpha combat guide — the cooldown math carries over directly into PvP, and most PvP losses can be traced back to a wasted ability slot.
Round-by-Round PvP Loop
The most consistent PvP loop in Kaiju Alpha's versus modes — including the dedicated PvP mode, free-for-all arenas, and the surprisingly competitive godzilla hide and seek rotations — revolves around a 90-second neutral exchange that mirrors the kaiju alpha boss arena's phase cadence, with beam cooldowns, dash punish windows, and ultimate economy functioning as the three pacing levers that separate diamond-rank players from bronze ladder.
-
0 to 15 seconds — open at mid-range, scout opponent's opener, do not commit cooldowns.
-
15 to 45 seconds — bait the opponent's beam or dash, punish the recovery with a melee string or counter-beam.
-
45 to 75 seconds — if ahead on HP, play for time and trade safely; if behind, commit your ultimate to force a beam clash or burst.
-
75 to 90 seconds — if both players are low, the player with the longer beam cooldown remaining has a slight edge in the final trade window.
Surviving Kaiju Alpha Free for All and Hide and Seek Modes
The kaiju alpha free for all format drops eight kaiju into one city map and lets them sort it out. The kaiju alpha hide and seek rotation flips that script — one kaiju is the seeker, the rest hide, and the hide-and-seek rounds cycle through seasonal maps like Tokyo and the Godzilla city variants. The kaiju alpha godzilla hide and seek mode is the same hide-and-seek format but with a themed Godzilla-only roster and Godzilla-specific hiding spots.
Both modes pull you sharply away from the structure of a standard kaiju alpha boss fight arena run, where the loop is straightforward: close distance, tank aggro, and burn the boss down before its enrage timer expires. In free for all and hide and seek, raw damage output from a single kaiju rarely decides the round, because the real threat is another player-controlled kaiju flanking you or collapsing your hiding spot. The shared underlying principle is positioning — holding high ground, controlling sightlines between buildings, and predicting enemy movement paths consistently outperforms a build that simply maximizes DPS.
Free for All Survival Priorities
In a free for all, the player who takes the first fight loses more than the player who watches. Eight kaiju on a city map means every engagement has a high chance of being interrupted by a third party. Experienced players follow a strict priority order:
-
Stay near map edges during the first 30 seconds. Center fights draw the most attention.
-
Target wounded kaiju — if two players are mid-fight, the kaiju who lands the killing blow on the first player is suddenly the new lowest-HP target. Wait for that opening.
-
Use the building density — cities have destructible cover. Breaking a building at the right moment can drop a pursuing kaiju into a stun state for free.
-
Save your ultimate for third-party cleanup — a beam clash on a mid-fight gives you a free beam-clash win because both opponents are already softened.
Hide and Seek and Godzilla Hide and Seek
The standard hide and seek and the kaiju alpha godzilla hide and seek rotation use the same core rules but different rosters. According to community testing, the Godzilla-only variant has tighter hiding spots, which makes the map knowledge skill ceiling noticeably higher.
| Mode | Roster | Map Pool | Best Strategy |
|---|---|---|---|
| Standard Hide and Seek | All unlocked kaiju | Tokyo, City, Forest | Pick a kaiju with a small hitbox; hug map edges |
| Godzilla Hide and Seek | Godzilla family only | Godzilla City, Tokyo | Learn the rooftop hiding spots; the seeker cannot climb as fast |
Hiding spot knowledge is the single biggest lever in hide and seek, and a solid grasp of the map layout will outperform any kaiju pick. Players who want a deeper breakdown of map-specific hiding routes should look at a dedicated map guide, since the hiding spots change with each seasonal update.
Building a Practical Boss Fight Rotation in Kaiju Alpha
The strongest kaiju alpha boss fight rotation is not the most expensive — it is the one that covers the most boss archetypes while staying inside a reasonable Cells farming budget. Free kaiju like Minus One, Super Goji, and Zilla 2004 handle the majority of boss archetypes when built correctly, and only a handful of boss phases justify a paid gamepass pick.
The Daily 30-Minute Boss Fight Loop
A realistic session that covers all the major game-modes looks like this, structured around the kaiju alpha boss arena opener, the kaiju alpha pvp mode rotation, the kaiju alpha free for all match, and the closing kaiju alpha hide and seek round — each block sized to clear a specific daily quest without burning stamina on redundant fights.
-
0 to 5 minutes — queue into one boss arena run to clear the daily boss quest.
-
5 to 15 minutes — rotate through two to three kaiju alpha pvp mode matches for ranked progression and the daily PvP quest.
-
15 to 22 minutes — drop into one kaiju alpha free for all match for the daily kill quest.
-
22 to 30 minutes — finish the session with a quick kaiju alpha hide and seek round for the bonus Cells and the daily hide quest.
This loop clears every daily quest tied to a game-mode in roughly half an hour, which is the sweet spot reported by experienced players. Going longer than 40 minutes in a single session tends to hit diminishing returns on Cells per hour because the daily quest bonuses expire at midnight server time.
Recommended Loadouts by Session Goal
| Session Goal | Best Mode | Kaiju to Bring | Why |
|---|---|---|---|
| Daily quest clear | Boss arena | Minus One (Evolved) | Covers all boss archetypes |
| Cells farming | Free for all | Striker Eureka | High damage per kill, fast respawns |
| Ranked climb | PvP mode | Destoroyah Perfect Form | Beam clash dominance |
| Fun / seasonal | Godzilla Hide and Seek | Any Godzilla variant | Themed rewards, no rank pressure |
Players who want to push the harder endgame bosses should also brush up on Kaiju Alpha progression tips — most late-game boss clears assume your kaiju is at least level 150 with a Limit Break invested, and running a level 80 kaiju into a Skar King enrage is the fastest way to burn through your Cells without earning the reward.
According to the All Star Tower Defense on Roblox showcase, the Kaiju Alpha boss fight features a multi-phase encounter where the boss shifts attack patterns and summons smaller enemies as its health depletes.
Reading Boss Patterns and Adjusting Mid-Fight
The biggest difference between a player who clears a kaiju alpha boss fight in two attempts and a player who wipes fifteen times is pattern recognition. Bosses in the arena have a finite move pool, and once you have seen the full pool, every subsequent run becomes a script you can read.
According to community testing, the average boss has between 6 and 9 distinct attacks, and roughly 80% of those attacks can be baited into the same punish window. The other 20% are designed to interrupt greedy punish attempts and reset the engagement to neutral. Players who chain punish attempts past the first window will eat the interrupt and lose the run.
The Bait, Punish, Reset Loop
The most reliable loop for kaiju alpha boss arena clears is a strict three-step cycle: Bait → Punish → Reset, executed in that exact order every time you re-engage, because skipping any single step breaks the timing window the encounter is designed around. The cycle works because every kaiju alpha boss archetype — from the close-range bruisers to the beam-spamming aerial types — commits to a wind-up animation before its highest-damage attacks, and that committed animation is the only point where you can safely enter melee range without eating a reversal hit. Treat the cycle as a rigid 1-2-3 rather than a fluid flow: bait the tell, punish only during recovery frames, then hard-reset to outside the threat ring before the boss recovers, since re-engaging during the recovery animation is the #1 cause of one-shot deaths documented across kaiju alpha how to beat boss community clears.
-
Bait — stand just outside the boss's preferred range and force a committed attack. The boss will pick one of its long-wind-up attacks and commit.
-
Punish — close the gap during the recovery frames and land two to three melee hits or a full beam clip. Do not overcommit.
-
Reset — back out of the boss's threat range and wait for the next bait opportunity. Re-engaging too early is the most common cause of mid-run deaths.
This loop works against every boss archetype because every boss has a recovery window, and the recovery window is where your damage actually lands. Players who skip the reset step and try to chain punishes will eventually catch a melee swipe or a beam sweep and lose the run.
Mid-Fight Adaptation Tips
Veteran kaiju alpha boss fight players don't rely on raw reaction time — they layer habits that compound across the 90-second enrage timer and the two phase shifts, prioritizing information gathering over damage in the first 20 seconds so the rotation loop, punish windows, and disengage timing all become predictable instead of reactive.
-
Track which attacks you have already seen — once the boss has cycled through its full move pool, the next attack is guaranteed to be a repeat. Punish the repeat with full commitment.
-
Save the ultimate for the phase shift — most bosses shift phases at 50% HP, and the phase shift is a 3-second vulnerability window where your ultimate is guaranteed to land.
-
Watch for the enrage flash — the visual cue that fires at the 90-second mark gives you roughly 5 seconds to reposition before the boss's damage and speed buffs kick in. Use those 5 seconds to disengage and reset the engagement range.
Frequently Asked Questions
What is the fastest way to clear a kaiju alpha boss fight?
Build around a versatile kaiju like Evolved Minus One or Super Goji, learn the boss's move pool, and run the bait-punish-reset loop. Most bosses clear in two to three minutes once you can recognize the full attack cycle, and rushing the damage phase will usually cost you more time than it saves.
How do I win beam clashes in kaiju alpha pvp mode?
Mash at a rate of 4 to 5 taps per second, which is the input window the game actually reads. Faster mashing gets filtered out, and slower mashing loses the clash bar. Also save your beam cooldown for when the opponent is already committed, because an unopposed beam is free damage and an opposed beam is a clash you may not win.
Is the kaiju alpha godzilla hide and seek mode worth playing?
Yes, especially during seasonal rotations. The Cells per minute rate is lower than free for all, but the seasonal reward drops are worth the time, and the mode is a good way to practice map awareness and positioning without the pressure of ranked PvP. Pick a small-hitbox kaiju and learn the rooftop hiding spots for the biggest advantage.
What is the best kaiju for kaiju alpha free for all?
Striker Eureka is the most consistent pick because of the high damage per kill and the fast respawn utility. For a free-to-play option, Super Goji handles most free for all lobbies without spending Robux. The key in free for all is not picking the strongest kaiju — it is picking a kaiju that lets you third-party mid-fights without dying to the cleanup.
How do I unlock more kaiju without spending Robux?
Farm Cells through the boss arena and free for all rotations, then spend the Cells on the free kaiju unlocks in the shop. Some kaiju like Monster Zero require collecting hidden skull fragments, and the Kaiju Alpha codes for cells list refreshes every patch with bonus Cells drops that speed up the unlock grind significantly.